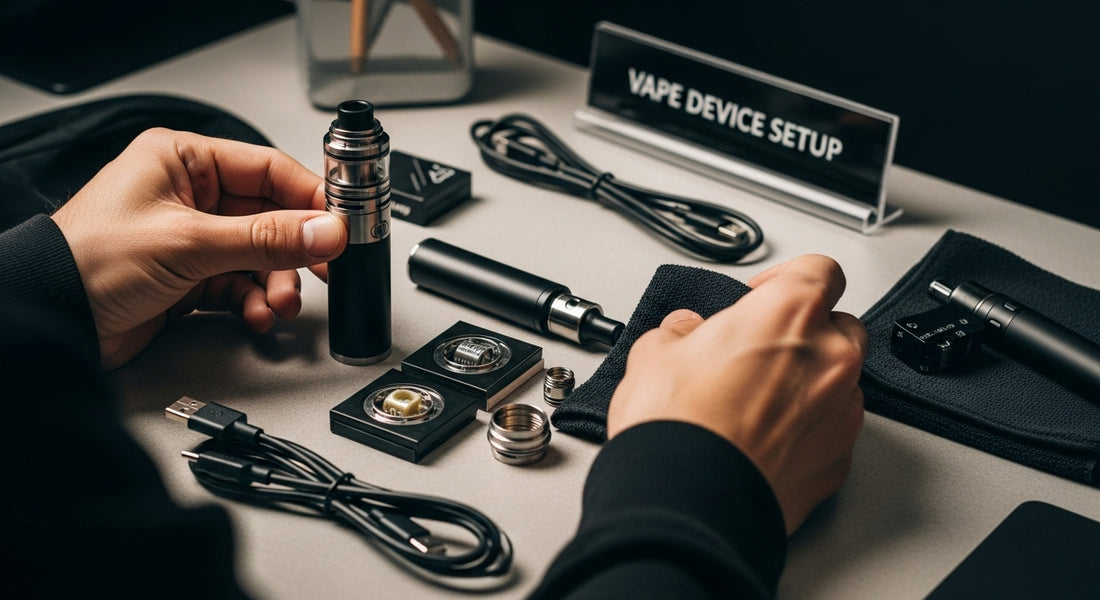
Setting up a vape might seem simple, but every step matters for your safety and satisfaction. Most people skip the details, yet even a tiny error in assembly can lead to leaks, weak hits, or ruin your coils in minutes. Here is the part nobody expects: gathering and checking your parts is the biggest secret to enjoying perfect flavor with no problems down the road.
Table of Contents
- Step 1: Gather All Necessary Components
- Step 2: Charge Your Vape Device Fully
- Step 3: Attach The Vape Tank And Coil
- Step 4: Fill The Tank With E-Liquid
- Step 5: Set The Proper Wattage And Temperature
- Step 6: Test And Verify Device Functionality
Quick Summary
| Key Point | Explanation |
|---|---|
| 1. Gather all essential components | Collect a compatible battery, tank, coils, and charging cable for effective setup and performance. |
| 2. Fully charge your device | Use the manufacturer’s cable to charge your vape completely before first use to ensure battery longevity and functionality. |
| 3. Attach tank and coil carefully | Ensure proper threading and alignment when connecting the coil and tank to prevent damage and leakage. |
| 4. Fill tank precisely | Use a clean, narrow-tipped bottle to fill without overfilling, leaving air space to enhance vapor circulation. |
| 5. Test device functionality | Conduct visual inspections and a firing test to confirm all components work correctly before using the vape. |
Step 1: Gather All Necessary Components
Successfully setting up your vape device starts with meticulous preparation and assembling the right components. Before diving into the setup process, understanding what you need and why each component matters will streamline your entire vaping experience.
Begin by collecting your primary vaping equipment. You will need a vape battery or mod, which serves as the power source for your device. This component determines the overall performance and potential customization options. Select a battery that matches your intended usage pattern, whether you prefer a compact design for portability or a more powerful mod for enhanced vapor production.
Next, gather your vape tank or atomizer. This crucial component holds your cannabis concentrate or e-liquid and is responsible for transforming the liquid into vapor. Different tanks offer varying capacities and compatibility with specific coil types. Consider factors like resistance levels, material construction, and airflow design when selecting your tank.
Complement your setup with high-quality coils matching your specific device specifications. Coils are heating elements that vaporize your chosen liquid, and their quality directly impacts flavor intensity and vapor production. Inspect each coil for manufacturing consistency and ensure they are compatible with your tank’s resistance requirements.
Additional essential components include:
- Charging cable specific to your battery device
- Replacement coils
- Clean cloth or paper towels for device maintenance
Preparing your workspace is equally important. Choose a clean, flat surface with good lighting and proximity to an electrical outlet if you need to charge your device. Keep your components organized and easily accessible to facilitate a smooth setup process.
To help you prepare, here is a table summarizing the main components needed for vape device setup, along with their purpose and related considerations.
| Component | Purpose | Key Considerations |
|---|---|---|
| Vape battery or mod | Provides power to the vape device | Choose correct size and compatibility |
| Vape tank or atomizer | Holds and vaporizes e-liquid or concentrate | Ensure proper capacity and fit |
| High-quality coils | Heats up to vaporize liquid | Match resistance to tank/device |
| Charging cable | Recharges battery | Use manufacturer-approved cable |
| Replacement coils | Allows for future coil changes | Have extras for maintenance |
| Clean cloth/paper towels | Keeps components clean and residue-free | Handy during assembly and cleaning |
Verify that all components are clean, undamaged, and compatible before proceeding. Check for any visible manufacturing defects or wear that might compromise device performance. By carefully gathering and inspecting your vape device components, you set the foundation for a reliable and enjoyable vaping experience.
As recommended by Public Health Experts, always prioritize purchasing components from reputable manufacturers and authorized retailers to ensure product safety and quality.
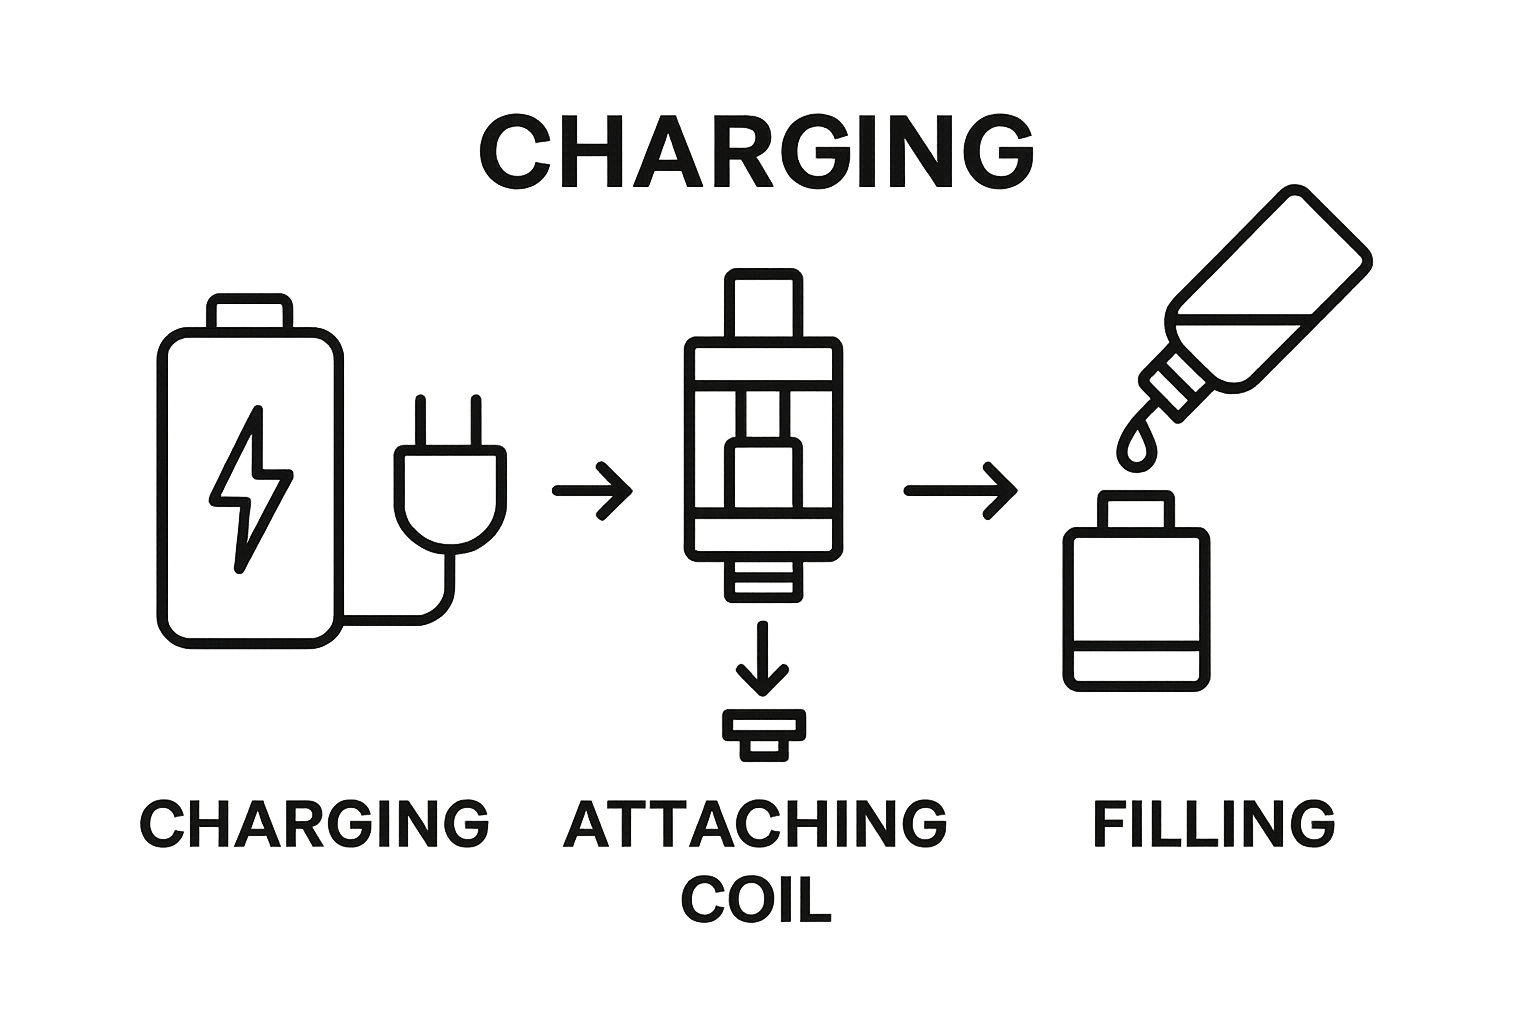
Step 2: Charge Your Vape Device Fully
Preparing your vape device for optimal performance begins with a complete and proper charging process. Battery preparation is critical to ensuring consistent device functionality and preventing potential interruptions during your vaping experience. Before connecting your device to a power source, carefully examine the charging port and cable for any signs of damage or debris that might compromise the connection.
Select the manufacturer-provided charging cable or a high-quality cable specifically designed for your device model. Cheap or incompatible charging cables can potentially damage your battery or reduce its overall lifespan. Connect the cable to a reliable power source, preferably a wall outlet with stable electrical output. Avoid charging through computer USB ports or unpredictable power sources that might deliver inconsistent electrical current.
Insert the charging cable into your vape device, ensuring a secure and proper connection. Most modern vape devices feature indicator lights that signal the charging status.
This table provides a quick reference to common charging indicator light patterns and their meaning, so you can verify battery status at a glance.
| Indicator Light | Charging Status |
|---|---|
| Solid red | Device is charging |
| Blinking green | Charging complete |
| Alternating colors | Charging error detected |
| Solid color (post-charge) | Fully charged and ready |
| Typical charging indicators include: |
- Solid red light: Device is actively charging
- Blinking green light: Charging is complete
- Alternating color patterns: Potential charging error
Allow your device to charge completely before initial use. This typically requires between 60 to 90 minutes, depending on battery capacity and device specifications. Resist the temptation to interrupt the charging cycle prematurely, as this can negatively impact battery performance and longevity.
While charging, place your device on a non-conductive, heat-resistant surface away from direct sunlight or extreme temperatures. Avoid charging near flammable materials and never leave the device unattended during the charging process. Some advanced devices offer pass-through charging, allowing usage while connected to power, but confirm this feature exists in your specific model before attempting.
Once fully charged, unplug the device and verify its functionality by powering it on and checking the battery indicator. A fully charged device should display a consistent, solid color indicating maximum battery capacity. If you notice any irregularities like rapid battery drain or inconsistent performance, consult the manufacturer’s guidelines or contact their customer support.
For more insights into selecting and maintaining quality vaping devices, check out our comprehensive guide on cannabis vapes, which provides additional details on device care and optimization.
By following these charging guidelines, you establish a solid foundation for a reliable and enjoyable vaping experience, ensuring your device performs optimally from the first use.
Step 3: Attach the Vape Tank and Coil
Connecting your vape tank and coil represents a critical phase in device setup that directly impacts your overall vaping performance. Precision and careful handling are paramount during this process to ensure optimal functionality and prevent potential damage to your device components.
Begin by inspecting your new coil for any visible manufacturing defects or inconsistencies. A high-quality coil should have uniform threading and no visible damage to its heating element. Gently unpack the coil, holding it by its base to avoid contaminating the cotton wicking material that will absorb your cannabis concentrate or e-liquid.
Prepare the coil by priming its cotton wick. This involves carefully applying a few drops of your chosen liquid directly onto the exposed cotton material. Priming prevents dry hits and extends the coil’s operational lifespan. Allow the liquid to absorb into the wick for several minutes, ensuring complete saturation without oversaturating the material.
Aligning the coil with your tank requires careful attention. Threading is crucial - cross-threading can permanently damage your device and compromise its seal. Gently insert the coil into the tank base, rotating it clockwise with minimal pressure. Most modern tanks feature a subtle click or resistance that indicates proper installation.
Key considerations during tank and coil attachment include:
- Verify coil compatibility with your specific tank model
- Ensure complete and secure threading
- Check for any visible gaps or misalignments
- Confirm the coil is centered within the tank base
Once the coil is securely installed, attach the tank to your device’s connector. Most contemporary vape devices use a 510 threaded connection, which requires gentle, straight alignment. Avoid overtightening, as this can strip threads or create unnecessary stress on the device components.
After attachment, perform a visual inspection to confirm everything is properly seated. The tank should sit flush against the device body without wobbling or creating uneven contact points. A well-installed tank will feel stable and show no signs of misalignment.
To verify successful installation, explore our comprehensive guide on cannabis vape technology for additional insights into proper device configuration. Understanding the nuanced details of tank and coil attachment ensures a smoother, more enjoyable vaping experience from the first use.
By methodically following these steps, you transform individual components into a cohesive, high-performing vaping system ready for your preferred cannabis concentrate.
Step 4: Fill the Tank with E-Liquid
Filling your vape tank requires precision and care to ensure optimal performance and prevent potential leakage or damage. Proper liquid handling represents a critical step in your vaping setup process, directly impacting flavor quality and device functionality.
Begin by identifying your tank’s specific filling mechanism. Most contemporary vape tanks feature either top-fill or bottom-fill designs, each requiring a slightly different approach. Top-fill tanks typically have a hinged or screw-off cap that reveals a central filling port, while bottom-fill tanks might require removing the entire base to access the liquid chamber.
Before adding your cannabis concentrate or e-liquid, carefully inspect the tank for any residual moisture or debris. Use a clean, lint-free cloth to wipe the interior surfaces, ensuring a pristine environment for your chosen liquid. Select a high-quality liquid that matches your device’s specifications and your personal preference for flavor intensity and vapor production.
When filling, maintain a steady hand and use precision. Hold your liquid bottle at a slight angle, allowing controlled dispensing directly into the tank. Avoid overfilling by leaving a small air pocket near the top of the tank, typically about 1-2 millimeters from the tank’s maximum capacity. This air space prevents potential leakage and allows proper vapor circulation.
Critical considerations during tank filling include:
- Use a clean, narrow-tipped bottle for precise liquid dispensing
- Avoid getting liquid on the central airflow chimney
- Wipe away any accidental spills immediately
- Close the tank filling port securely after completion
After filling, allow the liquid to saturate the coil’s cotton wick for several minutes. This absorption process ensures even flavor distribution and prevents potential dry hits that can damage your coil. Tilt the device gently to help the liquid reach all areas of the wicking material.
Verify the tank’s seal by checking for any signs of leakage around the connection points. A properly filled tank should feel stable and show no liquid seepage. If you notice any inconsistencies, carefully disassemble and reassemble the tank, ensuring all components are correctly aligned.
For enthusiasts seeking deeper insights into liquid selection and tank maintenance, check out our comprehensive guide on cannabis vapes, which offers expert recommendations and troubleshooting tips.
By methodically following these filling instructions, you create an optimal environment for a smooth, flavorful vaping experience that maximizes your device’s performance and longevity.
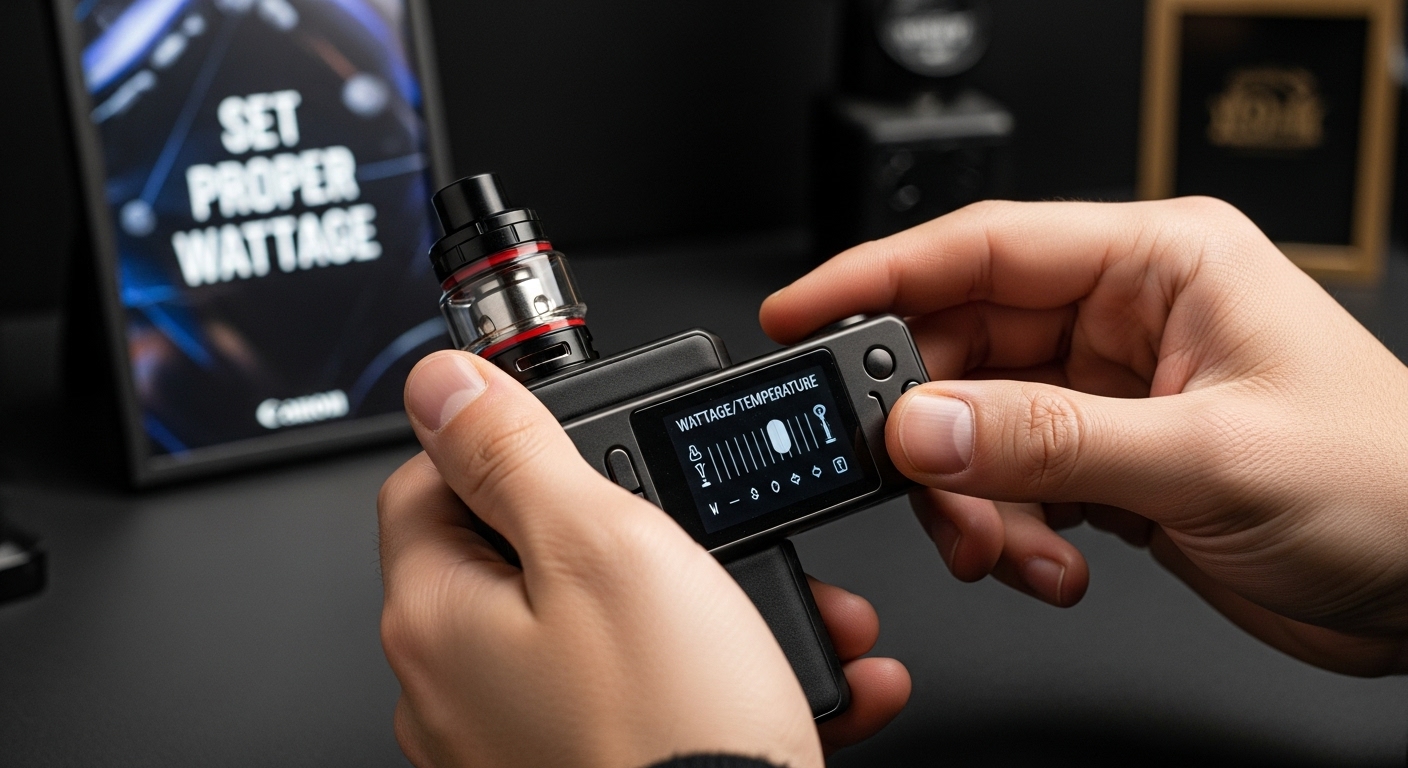
Step 5: Set the Proper Wattage and Temperature
Configuring the optimal wattage and temperature represents a pivotal moment in your vape device setup, directly influencing flavor quality, vapor production, and overall vaping experience. Precision is paramount when adjusting these critical settings to match your specific device, coil, and liquid characteristics.
Begin by carefully examining your coil’s recommended wattage range, typically printed directly on the coil or included in the manufacturer’s documentation. These specifications provide a crucial starting point for safe and effective device operation. Most contemporary vape devices feature digital interfaces that allow precise adjustments, enabling you to fine-tune your settings with remarkable accuracy.
Start at the lower end of the recommended wattage range and gradually increase the power. This methodical approach prevents potential coil damage and allows you to discover your preferred flavor intensity and vapor production. Temperature control becomes equally important, especially when using cannabis concentrates that require specific heating parameters to preserve terpene profiles and prevent degradation.
Most advanced vape devices offer multiple operational modes:
- Variable wattage mode for direct power control
- Temperature control mode for precise heat management
- Custom curve settings for advanced users
- Bypass mode that mimics mechanical device performance
When setting temperature, consider the specific characteristics of your cannabis concentrate. Different compounds vaporize at unique temperature ranges, affecting flavor complexity and overall experience. Typically, temperatures between 315-440 degrees Fahrenheit provide optimal vaporization for most cannabis extracts, preserving delicate flavor nuances while ensuring efficient cannabinoid activation.
Carefully monitor your device’s initial performance after adjusting settings. Look for consistent vapor production, balanced flavor intensity, and smooth inhalation. Unusual burning tastes or inconsistent vapor might indicate the need for further fine-tuning. Pay attention to how quickly the coil heats and the density of vapor produced.
Safety remains a critical consideration during this process. Federal guidelines emphasize the importance of proper device configuration to prevent potential health risks associated with improper vaping equipment operation.
For enthusiasts seeking deeper understanding, our comprehensive guide on cannabis vapes offers additional insights into advanced device configuration techniques. By approaching wattage and temperature settings with patience and precision, you transform your vaping experience from standard to exceptional.
Step 6: Test and Verify Device Functionality
The final stage of vape device setup involves comprehensive testing and verification to ensure your equipment operates precisely as intended. Systematic evaluation is crucial for identifying potential issues before they compromise your vaping experience, allowing you to address minor complications proactively.
Initiate testing by performing a visual inspection of all device components. Check for secure connections between the tank, coil, and battery, ensuring no loose parts or potential points of liquid leakage. Confirm that your device’s threading remains clean and free from accumulated residue that might interfere with electrical conductivity or mechanical performance.
Power on your device using the manufacturer’s recommended activation sequence. Most contemporary vape devices require five rapid button clicks to transition between operational modes. Observe the display screen for any error messages or unusual indicator lights that might signal underlying technical issues. A stable display and consistent power indication represent positive initial signs of proper functionality.
Key verification points during device testing include:
- Confirm smooth power activation
- Check for consistent voltage output
- Verify temperature stability
- Assess vapor production quality
- Monitor battery performance
Perform a preliminary firing test without inhaling. Press and hold the activation button for a few seconds, watching the coil’s heating process. A well-functioning device will produce even, consistent heating without irregular temperature fluctuations or unusual sounds. Listen for any unexpected clicking, buzzing, or mechanical inconsistencies that might indicate internal component problems.
Next, conduct a cautious initial draw. Take a gentle, controlled inhalation to assess vapor production, flavor intensity, and overall device responsiveness. Pay attention to the draw resistance, which should feel smooth and consistent. Unusual resistance or inconsistent vapor density might suggest improper coil installation or liquid saturation issues.
Battery performance represents another critical testing parameter. Monitor how quickly your device consumes power and whether the battery maintains consistent voltage throughout your vaping session. Sudden power drops or rapid battery drainage could indicate potential cell degradation or charging system complications.
For additional insights into device maintenance and troubleshooting, explore our comprehensive guide on cannabis vape technology, which offers expert recommendations for ongoing device care.
By methodically testing and verifying your vape device’s functionality, you establish a foundation for a reliable, enjoyable vaping experience that combines performance, safety, and consistent quality.
Before you begin vaping, use this checklist to verify your device is properly assembled and fully functional.
| Step | What to Check | Successful Outcome |
|---|---|---|
| Visual inspection | Look for secure connections and no leaks | All parts are tight; no liquid visible |
| Power activation | Follow device startup sequence | Device powers on without errors |
| Indicator display | Watch for error messages | Stable display, correct battery status |
| Firing test (no inhale) | Press fire button briefly | Uniform coil heating, no odd noises |
| Initial draw | Take a gentle inhale | Smooth, flavorful vapor produced |
| Battery monitoring | Observe battery performance during use | No rapid drain, consistent power |
Ready to Experience Hassle-Free Vaping Perfection?
Have you ever felt overwhelmed trying to get every detail right when setting up your vape device? Missing just one step can lead to leaks, burnt hits, or wasted product—and that frustration is exactly what our customers want to avoid. From choosing the right coils to setting precise wattage and temperature, achieving a seamless and flavorful session takes more than guesswork. The good news is, you do not have to do this alone—all the trusted cannabis vapes, concentrates, and accessories you need for a perfectly dialed-in setup are waiting for you at Avondale Apothecary. Explore our curated collection and take control of your vaping journey with confidence.

Start your next session with zero guesswork and full peace of mind. Visit Avondale Apothecary to discover quality vape devices, premium cannabis concentrates, and advanced accessories—each product comes with detailed information and Certificates of Analysis for complete transparency. Do not let another session fall short. Shop now for the components and expert resources that turn every step in your setup into effortless satisfaction.
Frequently Asked Questions
What components do I need to set up my vape device?
You will need a vape battery or mod, a vape tank or atomizer, high-quality coils compatible with your device, a charging cable, and maintenance supplies like a clean cloth or paper towels.
How do I properly fill my vape tank with e-liquid?
Identify your tank’s filling mechanism (top-fill or bottom-fill), ensure it’s clean, and fill carefully while leaving a small air pocket to prevent leakage. Prime the coil with a few drops of liquid and let it absorb before you start vaping.
What should I consider when setting the wattage and temperature on my vape device?
Start with the recommended wattage range provided on your coil. Gradually increase until you find your preferred balance of flavor and vapor production. For temperature, consider the specific characteristics of the cannabis concentrate or e-liquid you are using.
How can I ensure my vape device is functioning correctly after setup?
Perform a visual inspection of all components, power on the device, and check for error messages. Conduct a firing test without inhaling to assess heating. Finally, take a gentle controlled draw to test vapor production and flavor quality.